Solderless LED Strip Connectors: A Comprehensive Guide to Attaching
Our perspective on lighting has evolved as a result of LED strip lights. These flexible ribbons of light are energy-efficient, portable, and simple to use. They can be placed along a room's ceiling to give it a contemporary appearance, behind your TV for a pleasant glow, or beneath cabinets in your kitchen. They are ideal for both small hobbies and large projects. However, the same problem eventually arises for all users of LED tape lights.
The strip must be cut to the proper length. Or you have to turn a sharp corner. Alternatively, to create a longer line of light, you must join two different pieces of the strip. Soldering was the only method available in the past. This meant that melting metal wire and creating a good connection required a soldering iron, a steady hand, and some practice. This is too complex and challenging for a lot of people. However, a much simpler solution is available today. The LED strip connector is that answer.
An LED connector is a tiny metal and plastic component that makes it simple and quick to connect LED lights. No specialized tools are required. Soldering skills are not required. These tiny components, also known as tape light connectors or LED clip-on connectors, make using LED strips easy for everyone. They make it possible to create custom lighting designs, which were previously extremely difficult.
Everything you need to know about these practical components will be covered in this guide. We'll go over the various types of LED light connectors, their purposes, and how to pick the best one for your project. We'll also provide you with a straightforward, step-by-step tutorial on how to use them properly. Additionally, we will assist you in resolving any common issues that may arise. You will be able to construct any lighting project you can think of after reading this and using LED tape connectors like an expert.
Why LED Strip Connectors Are Necessary Rather Than Soldering
Prior to discussing the various kinds of connectors, it's critical to comprehend their many uses. They are the ideal substitute for soldering, which is the primary factor. An extremely robust and dependable method of joining wires and electronics is soldering. It's frequently used by professionals. For the average person, however, it has a lot of drawbacks. A soldering iron, solder wire, and additional tools are required.
You have to hold off until the iron reaches a high temperature. You need to be careful not to burn yourself or your work surface. It takes practice to become proficient at making a clean, strong solder joint. A bad solder joint may cause your lights to flicker or stop working. Many times, soldering is too time-consuming and challenging for a simple home project.
In this case, strip lighting connectors come in handy. They are a true solderless solution. Their idea is simple. A small clamp or clip is used to physically connect the metal parts of the connector to the copper contact pads on the LED strip. It's a mechanical connection, not a melted one. As a result, the procedure is very easy and quick. A secure connection can be made in a matter of seconds. There is no need for heat, smoke, or specialized knowledge. If you make a mistake, it's simple to open the connector, move the strip, and then close it again. That isn't feasible with a soldered joint.
You have incredible flexibility because of this ease of use. Strips of LED lights are made to be cut. There will be a line with four copper pads and a scissors symbol every few inches. To obtain the precise length you require, you can cut the strip along this line. However, what do you do with the piece that's left over? That piece could be useless without a connector. You can quickly join that extra piece to another piece to make a longer strip by using an LED strip to strip connector. This lowers waste and saves money. An LED wire connector can also be used to join two strips of wire.
This enables you to accomplish tasks that are not achievable with a single, intact strip. You can run the lights up one side of a cabinet, jump across the top where you don't need light with a wire, and then run the strip down the other side. Led strip light connectors are crucial for any significant lighting project because of their capacity to cut, connect, and customize.
Recognizing the Various LED Connector Types
LED connectors are not all the same. They are designed for a variety of purposes. Choosing the right type of LED connector is the most important step in making sure your project is successful. They can be categorized based on their relationships and applications.
The strip-to-strip connector is the most widely used kind. This component is frequently referred to as an LED strip light joiner. A clip is attached to both ends of this tiny, rectangular piece of plastic. Its sole function is to directly connect one LED strip's end to another's beginning. One long, continuous strip of light is produced as a result. When you want to combine two shorter strips of strip light into a single, longer piece that can travel a great distance, these are ideal. It appears as though you only have one strip because of the extremely neat and nearly undetectable connection they make.
The strip-to-wire connector is another crucial kind. This kind of connector has a short length of wire on one side and a clip on the other to hold the LED strip. These connectors for LED light wires are very adaptable. You can bend and turn freely with the wires in ways that the stiff strip cannot. They are most frequently used to avoid sharp corners. A 90-degree bend in an LED strip can harm the circuits and cause the lights to go out. Alternatively, you can cut the strip at the corner, connect a strip-to-wire connector, bend the flexible wire around the corner, and then connect the next strip piece using a different connector.
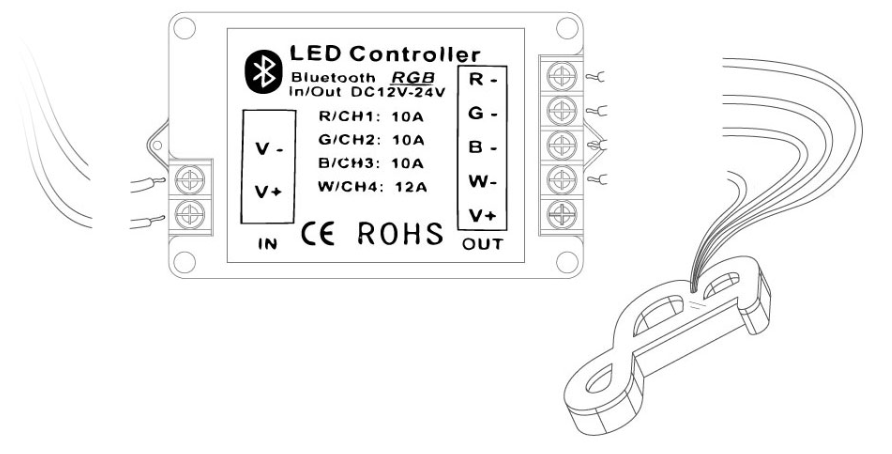
These can also be used to make your lighting gaps. For example, you can use strip-to-wire connectors and a longer length of wire to span the space over the stove if you are installing lights beneath a row of kitchen cabinets with a stove in the center. Additionally, they are the conventional method of connecting an RGB controller or the power source to the start of your LED strip.
You can also use these to make gaps in your illumination. Use strip-to-wire connectors and a longer length of wire to span the space over the stove, for instance, if you are installing lights beneath a row of kitchen cabinets with a stove in the center. Additionally, this is the standard method for connecting the start of your LED strip to an RGB controller or power source.
Additionally, you will notice connectors made especially for power. The purpose of an LED strip power connector is to serve as a link between your lights and the electricity that powers them. You may connect this to your led power supplies adapter via a strip-to-wire connector. Alternatively, it might be a unique led strip plug that plugs straight into the power brick and has a barrel jack on one end. These are frequently offered in conjunction with LED strip kits. They make power connections safe and easy.
Additionally, there may be variations in how these connectors attach to the strip. The LED clip-on connector is the most widely used kind. You lift up the little plastic door that hinges on it, slide the strip underneath, and then snap it shut. To make the connection, the snapping action forces tiny metal teeth or pins through the strip's copper pads. Another kind makes use of a clamp mechanism that may be a little more durable.
Additionally, components known as LED light terminals or an LED terminal connector will be visible. These are frequently utilized on the power supply or controller side. You loosen the tiny screws on them, put a bare wire into them, and then tighten them to clamp the wire in place. This gives the power cables a very solid and safe connection.
The Best Connector to Use for Your Project
Selecting the correct connector is easy, but you must carefully consider three factors. You must match the strip's width, number of pins, and type (waterproof or not). The connector will not function if any of these are incorrect.
The number of metal pins inside the connector should be checked first. This needs to line up with how many copper pads your LED strip has. Single-color LED strips are the most widely used kind. It only emits a single hue of light, such as blue or warm white. There are just two copper pads on these strips: one for positive (+) and one for negative (-). A 2-pin connector is required for these.
The RGB strip is the other highly popular kind. By combining red, green, and blue light, these can produce millions of different colors. Red (R), green (G), blue (B), and the 12-volt power (+) are the four copper pads on RGB strips. A 4-pin RGB strip light connector is required to connect these. Other varieties exist as well, such as RGBW strips, which have an additional white chip. These require a 5-pin connector and have five pads. Prior to purchasing connectors, make sure to count the copper pads on your strip.
The width of your LED strip is the second item you need to check. LED strips come in a variety of widths. Eight and ten millimeters are the two most popular sizes. The connector's plastic housing is designed to accommodate a particular width. The strip will not fit into an 8mm connector if it is 10mm wide.
It will be too loose if you attempt to use a 10mm connector with an 8mm strip. The pins inside the connector will not line up correctly with the tiny copper pads as the strip slides around. Your lights won't function properly as a result of this poor connection. Measure the width of your strip light's flexible circuit board with a ruler before purchasing any LED tape connectors. Next, confirm that the connectors you purchase are advertised for that precise width.
The waterproofness of your LED strip is the third consideration. A thick, transparent layer of silicone rubber covers many LED strips made for outdoor use or for areas like bathrooms. The electronics are shielded from water by this silicone covering. But the copper contact pads are also covered. This silicone prevents a standard connector from connecting.
Special connectors designed for waterproof strips are required. Stronger, sharper pins on these connectors are intended to penetrate the silicone covering and establish a firm bond with the copper pads underneath. It won't work to use a standard connector on a waterproof strip. The first step would be to carefully cut and remove the silicone covering from the contact pads. It is always preferable to purchase the appropriate connector type from the beginning because this can be very challenging to complete neatly.
A Step-by-Step Guide to Using LED Strip Connectors
It's very easy to use an LED connector. You can connect in less than a minute if you have the right connector that fits the width and number of pins on your strip. Let's go over each step.
Cutting your LED strip is the first step. Examine the strip's surface closely. You will notice a thin line crossing the strip every few inches. The round copper contact pads are located directly next to this line. Additionally, this line will typically have a tiny image of scissors. You should only ever cut the strip here. Make a clean, straight cut across this line with a sharp pair of scissors. If you cut anywhere else, the circuit will be harmed and that portion of the strip will stop working.
Preparing the strip's end is the second step. There is nothing you need to do if you are using a non-waterproof strip. The copper pads are prepared and already visible. However, you have an option if you're using a silicone-coated waterproof strip. You don't need to do anything if you have the specific connectors for waterproof strips. The work will be done by the sharp pins.
You must carefully remove the silicone from the top of the final section of the strip if you only have standard connectors. Gently score the silicone around the copper pads' edges with a tiny, sharp knife. The clean copper pads underneath should then be visible when you peel off the small square of silicone. Take extreme care to avoid making any cuts to the actual circuit board.
Opening the connector is the third step. A tiny plastic door or lid on the LED clip-on connector snaps shut. Gently pry this lid open with a small flathead screwdriver or your fingernail. On a hinge, it will swing upward. It has a plastic guide on one side and tiny metal pins on the other.
The LED strip must be inserted into the open connector in the fourth step. This is the most crucial section. The end of the strip must slide into the connector so that it passes beneath the metal pins. Observe the alignment carefully. The strip's copper pads need to be placed exactly beneath the connector's metal pins. The connection will not work if they are not in alignment.
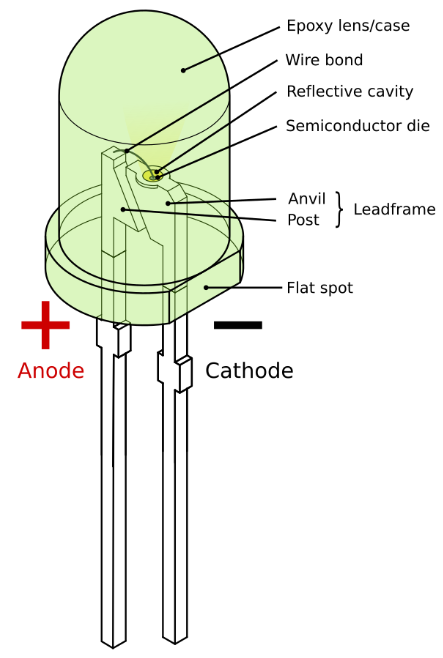
Additionally, you must be mindful of polarity. Labels such as "+," "G," or "R" will be placed next to the copper pads. Additionally marked will be the connector or the wires that emerge from it. You have to match them right. For instance, the pin that attaches to the positive wire and the "+" pad on the strip need to line up. The lights won't turn on if the polarity is incorrect.
Closing the connector is the fifth step. Just firmly press the plastic lid down until you hear and feel it snap shut, once you are certain the strip is in place and everything is lined up. This snapping action performs a crucial function. In order to prevent the strip from sliding out, it clamps it in place. Additionally, it compels the metal pins to firmly touch the copper pads. To ensure that the strip is held firmly and does not come loose, gently tug on it.
Testing your connection is the last step. Always test the lights before removing the adhesive backing and placing your strip in its final location. Turn on the lights and connect the power supply. It should light up brightly if it's a single-color strip. Verify that all three colors—red, green, and blue—work if the strip is RGB. Your connection is successful if everything appears to be in order. You can proceed to troubleshooting if there is an issue.
How to Fix Common LED Connector Problems
Connectors are simple to use, but occasionally you may run into issues. The good news is that fixing these issues is nearly always simple. These are the most typical problems and their fixes.
The most frequent issue is that when you touch the connector, the lights either flicker on and off or do not turn on at all. Almost invariably, a poor connection within the clip is the cause of this. Turning off the power should be your first action. Next, open the lid of the connector. Verify that the strip is inserted all the way. It may appear to be in at times, but it hasn't moved far enough to sit beneath the pins. Additionally, confirm that the copper pads and pins are precisely aligned.
The connection may break even if you are only slightly off. Make sure the clip snaps shut firmly by closing it again. To check if the connector is defective, try using the other end of the strip or another connector if it still doesn't work. Additionally, confirm your polarity. The lights won't turn on if the positive and negative sides are switched.
Inaccurate color is another frequent issue that is unique to RGB strips. For instance, the lights turn green even though you have the remote control set to red. A defective strip is not the cause of this issue. The connector has an alignment issue. It indicates that the red signal's pin is in contact with the green signal's copper pad. Carefully examine the labels on the strip (+, G, R, B) after opening the connector. Verify that each one is precisely beneath the appropriate pin. Sometimes this issue can be resolved by simply sliding the strip slightly to the left or right.
The connector may occasionally feel loose, and the strip may come out with ease. This typically indicates that the connector size you are using is incorrect. It is possible that you are using an 8mm strip with a 10mm connector. Getting the right size connector is the only way to solve the problem. You can try a small trick if you are certain that you have the correct size but it still feels a little loose. The connector and the strip can be wrapped with a single, tiny piece of electrical tape. In locations where there may be vibrations, this can help hold it together more firmly.
You can go beyond utilizing a single, straight strip of lights by comprehending how these straightforward yet effective components operate. Anywhere in your house or office, you can create intricate, exquisite, and expert-looking lighting installations with LED strip light joiners and all the other kinds of connectors. They give everyone access to the power of custom lighting design while removing the obstacles associated with soldering.


